DIY : Ukur kompresi mesin Aerio (kurang tepat)


gambar 1 - Persiapan

gambar 2 - Kompresi Cylinder 1
Percobaan menggunakan Compression Tester yang sebelumnya newbie beli. Di Judul Newbie beri kata-kata kurang tepat karena newbie melakukan 2 kesalahan : pertama newbie tidak melakukan warming up engine dan mengukur pada saat mesin benar-benar dingin, kedua newbie tidak melakukan crank dengan membuka Throttle (Wide Open Throttle). Maklum nih masih newbie, next time ditest lagi dengan benar deh.....
Yang perlu diingat disini masalah safety : Jangan sampai percikan koil/busi yang dilepas menyambar bahan mudah terbakar, Sebaiknya aliran bensin misal fuelpump diputus selama melakukan cranking.

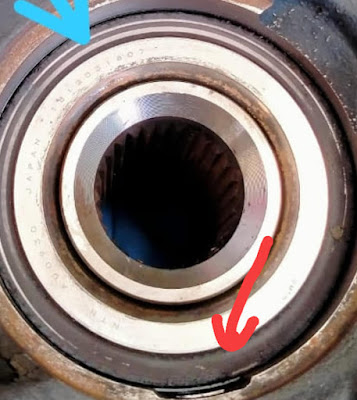
gambar 3 - Kompresi Cylinder 2

gambar 4 - Kompresi Cylinder 3

gambar 5 - Kompresi Cylinder 4
Hmmm dari 4 Cylinder yang pembacaan rada rendah ntuh Cylinder no 2. Sempet beberapa kali terjadi ngowos atau kebocoran kompresi pada lubang busi yang dipasang alat tester sehingga berpengaruh juga. Pembacaan yang rendah juga dikarenakan Mesin belum panas, secara mesin yang pada suhu kerja maka tekanan udara juga lebih meningkat dan oli juga lebih bersirkulasi dengan baik dan menambah seal kompresi demikian juga dengan logam-logam memuai sesuai dengan temperatur ideal mesin. Selain itu dengan melakukan Wide Open Throttle yang di sini tidak newbie lakukan, sebenarnya untuk meyakinkan bahwa udara yang terhisap masuk lewat klep In sewaktu cranking dipastikan cukup memenuhi ruang bakar dengan baik. Kedua hal ini membuat pengukuran tidak akurat, bahkan bila dibandingkan dengan nilai menurut Manual Book Aerio.
Nilai pembacaan sebagai berikut (kurang lebih) :
| No Cylinder | Tekanan (psi) | Tekanan (kg/cm2) |
| 1 | 159 | 11.2 |
| 2 | 155 | 10.9 |
| 3 | 158 | 11.1 |
| 4 | 161 | 11.3 |
Selisih cylinder tertinggi : 6 psi atau 3.7%

gambar 6 - busi sebelum dibersihkan sesuai urutan cylinder

gambar 7 - busi sebelum dibersihkan

gambar 8 - busi setelah dibersihkan
Tulisan yang ada di balik kemasan :
Tulisan yang ada di Manual Book Aerio
- Flexible hose for easy access 14 and 18 mm universal fit plus long reach adapter, Side mounted pressure release valve
- 2 3/4" Easy to read scale 0-300 psi and metric 0-21 kg per sq cm.
rules for safe operation
Do not touch the hot exhause manifold, radiator, or other hot parts of the engine, while not lethal, an involuntary jerk of the hands may cause you injury.
testing procedure
- Run the engine for about 15 minutes until it reaches normal operating temperature.
- Stop engine. Disconnect all spark plug wires one at a time and label for proper reconnection.
- Loosen all spark plugs about one turn, then use an air hose or tire pump to blow all the dirt out of the spark plugs and gaskets. Place them on a clean, flat surface in the order in which they were removed. This will help to correlate any compression problems with the conditions of the plug from the particular cylinder involved.
- Remove the Air Filter and block open the carburator throttle plates to maximum. Remove the high tension lead from the center of the distributor and ground it. To disable electronic ignition system, disconnect the electronic ignition module or remove the primary battery terminal from the distributor cap. (On Ford V8 and V6, disconnect the primary lead from the distributor cap.)
- Screw the spark plug adapter hose into the spark plug hole. Hand tighten only - DO NOT USE A WRENCH
- Now crank the engine for at least 4 compression strokes or until pressure stops rising on the tester.
- Record the compression reading and repeat the test on all remaining cylinders. (Step No.5 and 6).
TEST RESULTS
- On a normal cylinder, the needle should advance on each stroke until it reaches a peak. All cylinders should test within the engine manufacturers specifications and reading should not vary more than 10% from cylinder to cylinder.
- If the needle fails to advance normally or if it remains the same for several strokes and then starts to climb, the cylinder has a sticky valve.
- If the compression reading is considerably higher above the manufacturers specification, it is indicative of carbon build-up in the cylinder. Use of spark plug with a highier heat range can sometimes correct this fault.
- If a reading on two adjacent cylinders is 20 pounds or more lower than other cylinders, a defective head gasket is indicated. Water and or oil may be seen in the two cylinders.
- If readings are low or uneven between cylinders, pour a teaspoon of S.A.E. #30 oil into each cylinder and retest. If the readings increase considerably, the fault is poorly seated or worn rings. If the readings remain about the same, the valves are at fault.
- Reconnect all spark plug wires in proper order. Reconnect the secondary coil wire to the distributor, and return the carburator throttle valve to the original setting before starting the engine.
Compression Check
Check compression pressure on all 4 cylinders as follows:1) Warm up engine to normal operating temperature.2) Stop engine after warming up.NOTE:After warming up engine, place transaxle gear shift lever in “Neutral” (shift selector lever to “P” range for A/T model), and set parking brake and block drive wheels.
gambar 9 - Penjelasan Manual Book step 3 - 16
3) Remove cylinder head upper cover (1).4) Disconnect ignition coil couplers (1).5) Remove ignition coil assemblies (2) with high-tension cord (3).6) Remove all spark plugs.7) Disconnect fuel injector wires (4) at the coupler.8) Install special tools (compression gauge) into spark plug hole.Special tool(A) : 09915-64510-001(B) : 09915-64510-002(C) : 09915-64530(D) : 09915-670109) Disengage clutch (1) (to lighten starting load on engine) for M/T vehicle, and depress accelerator pedal (2) all the way to make throttle fully open.10) Crank engine with fully charged battery, and read the highest pressure on compression gauge.
NOTE:
- For measuring compression pressure, crank engine at least 250 rpm by using fully charged battery.
- If measured compression pressure is lower than limit value, check installation condition of special tool. If it is properly installed, possibility is compression pressure leakage from where piston ring and valve contact.
Compression pressure
Standard 1400 kPa
(14.0 kg/cm2, 199.0 psi)Limit 1100 kPa
(11.0 kg/cm2, 156.0 psi)Max. difference between
any two cylinders
100 kPa
(1.0 kg/cm2, 14.2 psi)
11) Carry out Steps 8) through 10) on each cylinder to obtain 4 readings.12) After checking, install spark plugs and ignition coil assemblies (1) with high-tension cord (2).13) Connect ignition coil couplers (3).14) Connect fuel injector wires(4) at the coupler.15) Check cylinder head upper cover gasket for deterioration and then install it into groove of cylinder head upper cover (1) securely.16) Install cylinder head upper cover with gasket on to cylinder head cover.

Hmm, lain kali test lagi ah
regards,
singachu


referensi bagus :
ReplyDeletehttp://www.pumaracing.co.uk/comp.htm
http://www.automedia.com/Engine_Compression_Test/ccr20050801cc/2
regards,
singachu