DIY : {aeriostyle.com} tambah peredam suara


Copy paste dari : http://www.aeriostyle.com/forum/viewtop ... f=7&t=5694
Adding sound insulation to quiet the inside of the Aerio SX.
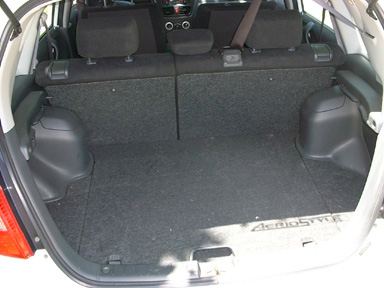
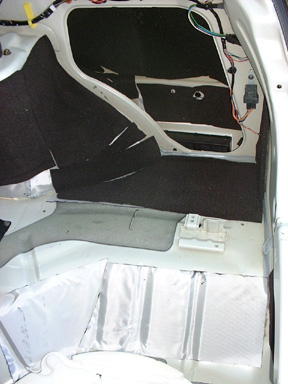
The starting point.
Open the back hatch.
Notice the Aerio Style shadow in the bottom right corner.
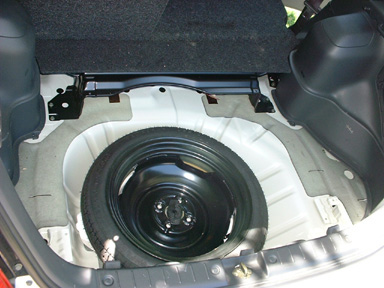
Remove all three floor covers and lift out the center plastic tray.
Notice how little insulation there is!
Be careful taking out the side plastic trays.
They are held in with little plastic push rivets.
The trick to safely remove these is to push the center down until it pops.
Then it should just lift out.
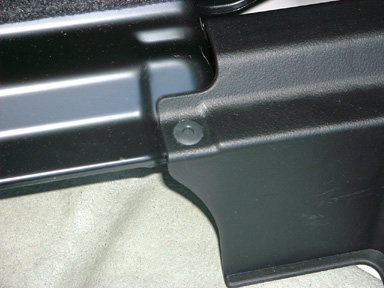
Remove the side covers by unbolting the lid support on the side and removing the push rivets.
Disconnect the light harness.
Notice the lack of insulation here too!

Be careful when removing the front rivets under the rear door sill.
You must remove the sill cover first and then remove the rivet under it.

Measure the area to be covered and try to precut the insulation.
Then cut the piece in half or more and install it piece by piece.
Trying to do it in one sheet in nearly impossible because the glue wants to stick to everything on the way to it's final destination.
Make sure you cut holes for all the rivet/bolt holes in the floor and sides, otherwise it will be impossible to find the holes to install the plastic covers.
Don't ask me how I know this...lol.

First layer of reinforced rubber.

Second layer of sound deadening foam and first layer on strut tower.

Second layer on strut tower and inner wall.
I single layered the rear bumper area.

Second layer on floor using the carpet padding like material.

Floor insulation complete and reinstalled side tower cover.
Reassemble plastic covers by reversing steps above.

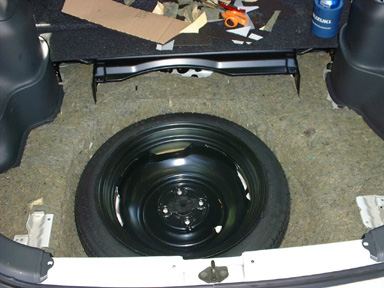
Reassembly including spare tire.
All done!


Adding sound insulation to quiet the inside of the Aerio SX.
The last time I removed the interior plastic panels of my Aerio SX, I realized how little Factory sound insulation was added to the Aerio.
This is an explanation of what I did to add sound deadening insulation to the rear of my Aerio and what it took to install it.
This is an explanation of what I did to add sound deadening insulation to the rear of my Aerio and what it took to install it.
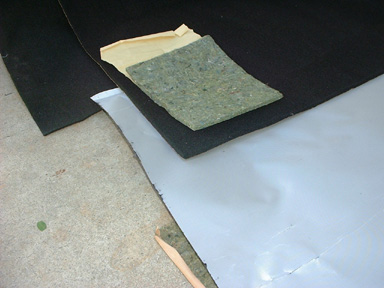
Here are the 3 different types of insulation I was able to get a hold of.
1) The bottom layer is a tar like rubber base with a nylon binder on top for strength.
2) The two different top layers I used were special black sound foam and what looks like carpet padding (actually automotive insulation).
Different versions of these should be available online.
1) The bottom layer is a tar like rubber base with a nylon binder on top for strength.
2) The two different top layers I used were special black sound foam and what looks like carpet padding (actually automotive insulation).
Different versions of these should be available online.
The starting point.
Open the back hatch.
Notice the Aerio Style shadow in the bottom right corner.
Remove all three floor covers and lift out the center plastic tray.
Notice how little insulation there is!
Be careful taking out the side plastic trays.
They are held in with little plastic push rivets.
The trick to safely remove these is to push the center down until it pops.
Then it should just lift out.
Remove the side covers by unbolting the lid support on the side and removing the push rivets.
Disconnect the light harness.
Notice the lack of insulation here too!
Be careful when removing the front rivets under the rear door sill.
You must remove the sill cover first and then remove the rivet under it.
Measure the area to be covered and try to precut the insulation.
Then cut the piece in half or more and install it piece by piece.
Trying to do it in one sheet in nearly impossible because the glue wants to stick to everything on the way to it's final destination.
Make sure you cut holes for all the rivet/bolt holes in the floor and sides, otherwise it will be impossible to find the holes to install the plastic covers.
Don't ask me how I know this...lol.
First layer of reinforced rubber.
Second layer of sound deadening foam and first layer on strut tower.
Second layer on strut tower and inner wall.
I single layered the rear bumper area.
Second layer on floor using the carpet padding like material.
Floor insulation complete and reinstalled side tower cover.
Reassemble plastic covers by reversing steps above.
Reassembly including spare tire.
All done!
One last thing.
Order a couple of the push rivets and have them on hand when removing the plastic covers.
The rivets get brittle over time and no matter how careful you are at removing them, you going to break one or two.
It's good to have a couple of replacements ready.
This simple mod has many benefits.
Your car will be quieter inside.
It will stay cooler in the summer and warmer in the winter.
It is almost idiot proof because no matter how it looks when it is done, it is all going to be covered by plastic covers and cannot be seen.
To complete the inside right fender and back it took about 2 to 3 hours.
Later I will complete the left inner fender area.
I think it was well worth the time.
Later I will complete the left inner fender area.
I think it was well worth the time.